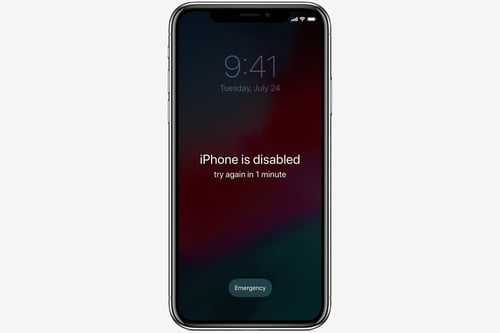
Passcodes have been maintaining a very strict security regime for iPhones and other iOS devices. It’s the first wall of defence when it comes to the iPhone’s passcode. However, if you try the wrong passcode on your iPhone multiple times, then the consequence might be as deadly as an ‘iPhone is disabled’ message.
How can a passcode go wrong when you have been entering it for almost an eternity? Well, it can be your kids or you, unknowingly, were ghost-touching the passcode screen. Additionally, you can’t discard the failed attempt of theft or a friend who is very curious about your personal life.
However, you are in great danger now as you can’t access your iPhone anymore. But, the great news is that it’s not forever. You can apply the following dedicated solutions to remove your device’s ‘iPhone is disabled’ message. Let’s get started.
How can You Recover Your Device that shows an ‘iPhone is Disabled’ Message?
Without wasting or investigating the reason behind your ‘iPhone is disabled’ message, you should concentrate on fixes to retrieve your phone’s functionality back. Fortunately, the solutions are not very complicated, and you can do it easily if you have set up iTunes and backed up your data to it.
Let’s check out all possible ways to get your iPhone back to productivity.
Use iTunes Backup: Recommended by Apple
When the ‘iPhone is disabled’ message pops up on your iPhone screen, the very next statement beside the message states, ‘connect to iTunes’. Otherwise, your iPhone might initiate a data wipe-out process, assuming that your iPhone has been stolen or lost. To avoid data loss, you should try connecting to iTunes.
Open the iTunes application on your Mac device or any other PC. But, you shouldn’t connect your iPhone to your PC right away. The next step can vary according to your iPhone model. If you have an iPhone 6S or earlier model than that, then press and hold the Side or Power button, and it will bring the Power slider on your iPhone screen.
Power off your device and connect your iPhone to your Mac or PC while holding the Home button. Don’t release the Home button until you can observe the recovery mode on your phone.
If it’s an iPhone 7 or iPhone 7 Plus, then you have to press and hold the power button. Turn off your device. Connect your iPhone 7 or equivalent model to your Mac or PC while holding the Volume down button. Keep the Volume Down button on hold unless the Recovery screen appears on your phone.
If it’s one of the latest iPhones, such as iPhone 8, iPhone X, iPhone SE (2020), or iPhone 11 or later, you have to do this instead. Press and hold any volume button along with the Power button. Turn off your iPhone and connect the device to your PC or Mac while holding the Power button. Keep holding that button until you can notice the Recovery mode.
Furthermore
The iTunes app will now ask for your permission to Update or Restore your iPhone. Go for the Restore option, and iTunes will start off the process to restore everything essential for your iPhone.
Before you execute this process for restoring your iPhone, keep in mind that you might face data loss. If you don’t keep your iPhone completely synced and backed up with iTunes, then there are fewer chances that you will get everything back. Therefore, consider backing up your data on iPhone with iTunes.
Alternative Restore Method through iTunes
If you suffer from issues while performing the above solution, then here’s another one. The ‘iPhone is disabled’ message might be popping up still, and you have to abide by the following guidelines:
- Connect your Mac or PC that has iTunes on it to your troublesome iPhone.
- Opt for the Restore option on iTunes for an appropriate approach.
- Go through the on-screen instructions for a successful restore the iPhone.
Take the Help from iCloud
iTunes can give you instant relief against the ‘iPhones is disabled’ message, but it might not work every time. If you have really lost your iPhone and don’t want the data to be accessed by anyone else, you should go for this solution. Or else, you can get the iPhone with factory defaults if you execute this plan. Here’s the workaround via iCloud that you can try using the following instructions:
- Open a browser on your computer and navigate to icloud.com/find.
- Enter your Apple ID and password to sign in to your account.
- Select your device that is showing the ‘iPhone is disabled’ message.
- Choose the Erase option and confirm the Erase choice.
- Next, you must authenticate the erase procedure with your Apple ID password. It will wipe out data from your iPhone and set up your iPhone as a brand new one.
- Check out the entire iPhone setup and restore process and get the latest backed up data through iCloud or iTunes.
Additional Tip: Initiate DFU Mode
Device Firmware Update mode is synonymous with Recovery mode. iPhone users have reported that entering into the DFU mode can eliminate the ‘iPhone is disabled’ message. Here’s how you can put your device into the DFU mode:
- Connect your computer to your iPhone. Your computer should have iTunes on it. Open the iTunes application and hold the Power button. Turn off your device by dragging the power slider.
- Hold Power and Home buttons simultaneously when the device is turned off. If your iPhone lacks the Home button, then hold the Power and Volume down buttons at the same time.
- Hold those buttons for 10 seconds and not more than that. Otherwise, it will enter Recovery mode.
- You can release the Power button but hold the Volume button or Home button for an additional 5 seconds. If the device’s screen is black, the iPhone has entered into DFU mode.
- Now, iTunes will recognise the device, and you can start the restore process as depicted on your computer screen.
Summing up
Handling the ‘iPhone is disabled’ message and applying the right solution can be tough. Instead, you can go for Touch ID or Face ID to relieve yourself from the tantrums of the passcode. Enable those features and refrain from putting your iPhone in pockets. If you find out that someone wants to unlock your iPhone over and over again, try to keep your device out of their reach.