Documenting what’s happening on your iPhone’s screen is possible, be it a movie clip to anything else. Additionally, screen recording can be a useful thing to help others to set up a particular setting on their newly-purchased iPhones.
It’s easy to record your iPhone screen. Moreover, you need not install any third-party application to record the iPhone screen. The device requires a few mandatory tweaks to enable screen recording. On the other hand, adding the screen recording feature to the Control Centre helps in accessing the feature as soon as possible.
Recording your iPhone screen is more precise than taking screenshots. Therefore, this guide will assist you in managing your iPhone’s screen recording. Let’s get started.
Enable the Screen Recording Feature on Your iPhone
Before you move on to how to record your iPhone screen, it’s important to turn on the feature. Otherwise, you can’t access the screen recording utility from the Control Centre of the iPhone. Primarily, the screen recording feature might be missing from some iPhone models.
But, the latest iPhone models have the screen recording icon in the Control Centre. If you can’t notice the feature under the Control Centre, then don’t panic.
Rather, go through the instructions below:
- Press Settings on the home screen.
- Scroll down until you can locate the Control Centre and tap it.
- Next, select the Customise Controls option.
- Try to find the Screen Recording option under More Controls.
- A + or Add sign will appear next to the feature.
- You must tap on it to include the Screen Recording feature in the Control Centre.
This will make space for screen recording under the Control Centre. You can skip the above guidelines if your iPhone’s Control Centre already has the screen recorder.
Steps to Record your iPhone Screen
Once you have easy access to your iPhone’s screen recording, you need a single tap to initiate the screen recording. The screen recording will keep track of every tap, swipe, and audio your iPhone screen encounters.
Here’s what you have to follow in recording your iPhone screen:
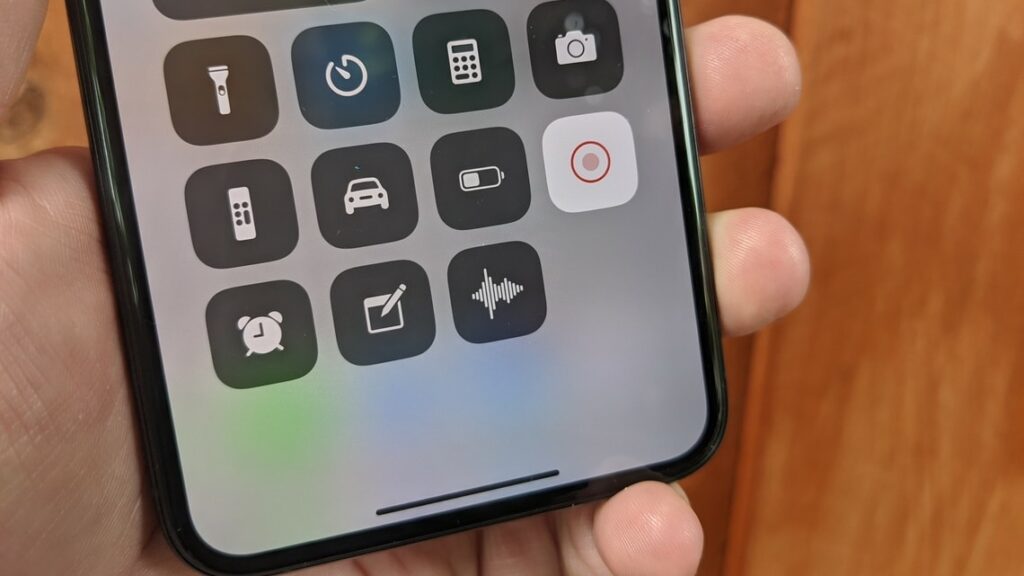
- Access the Control Centre. If it’s an iPhone 8 or older, then swipe up from the bottom of the screen to bring up the Control Center. Whereas a swipe down from the top of the screen would work for iPhone X or later models.
- The Screen Recorder icon will be there. Tap the Record option.
- Next, you will see a three-second countdown timer. After that, the device will indicate that the recording has started with a red dot in the top-left corner of the iPhone screen.
- Make sure that you exit the Control Centre and proceed to the required file path or application.
- Your iPhone keeps recording the video and audio of the iPhone’s screen. The clock at the upper-left corner of the screen will let you know the duration of the screen recording.
If you wish to stop the screen recording, simply press the bar at the top of the screen or the red clock. After that, press the Stop button.
Can you Add Audio to your iPhone’s Screen Recording?
The general screen recording feature on your iPhone lets you record video and audio coming from the screen. Surprisingly, you can record yourself while you are recording your iPhone’s screen. You need to press the microphone button before you record your iPhone screen. Check out the following steps for recording additional audio with a screen recorder:
- Start with pressing and holding the Screen Recorder button from the Control Centre.
- A pop-up window will appear with a microphone icon at the bottom of the screen.
- Tap the microphone to enable the audio recording first. Next, you can tap the Start Recording option.
- To close the Control Centre, you have to tap the screen twice.
- Now, the microphone will record the audio whenever you want to record your iPhone screen. Activate screen recording, and you’re good to go.
By the way, you can turn off the audio recording after opening the Control Centre and holding the microphone option.
How to Edit your iPhone Screen Recording?
After you record your iPhone screen, you can edit the entire video. The screen recording gets saved inside the iPhone’s Camera Roll under Photos. You can trim the video as per your convenience or add filters to spice up the screen recording.
Follow the guidelines if you are a newbie to iPhone screen recording:
- Explore Photos and navigate to the album called Camera Roll.
- Tap the screen recording and press the Edit option from the top-right corner of the iPhone display.
- From there, you can trim the video by utilising the timeline. Drag the arrow and drop according to your trimming preferences.
- Additionally, you can adjust the properties of the video by adding filters.
Ensure you preview the resulting video before opting for the Save option.
How to make Screen Recording Seamless on iPhone?
The screen recording might be interrupted by a sudden notification or a call. If you want the screen recording to be without any glitches and don’t want to repeat it, then this tip will benefit you. Just enable the Do Not Disturb feature. For the latest iPhones, you can set the Focus as Do Not Disturb, and you’re ready to record your iPhone screen.
In addition to this, keep your iPhone silent. Make sure that you tweak back to general settings after you’re done with screen recording.
Moreover…
If you are about to professionally record your iPhone screen, then your screen orientation plays an important role. For example, you would upload that screen recording clip to your YouTube channel.
Hence, decide whether you’ll record your iPhone screen sideways or up-and-down. Accordingly, you can keep the screen orientation enabled or disabled. Furthermore, use a good-quality microphone and connect it to your iPhone for a polished outcome.