While typing the passcode for your iPhone, try not to make a mistake; otherwise, your iPhone might get disabled. However, it occurs if a wrong passcode is entered multiple times.
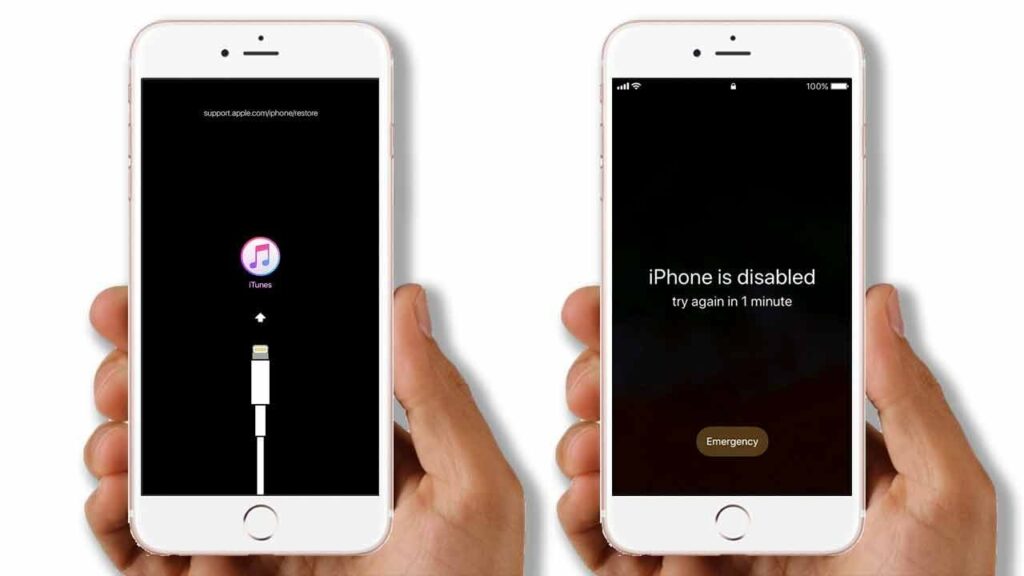
In this scenario, you would see a message on the screen saying, “iPhone is disabled. Connect to iTunes”. So, you need to connect the phone to a device that has iTunes in such cases. You can then backup your data and reset the iPhone to its default settings. This should help you gain access to the device.
However, as we shall see, iTunes is not the only hope for unlocking your device. But, it is the simplest way to get back access to a locked iPhone.
So, we are about to discuss how to unlock a disabled iPhone with iTunes. You must try out the below steps before approaching a service center.
What Causes the Disabled iPhone Issue?
Your iPhone would ask you to try again after a minute if you enter a wrong passcode once. And, it would keep increasing the lock time until the ninth wrong passcode input. On the tenth wrong input, it would ask you to connect to iTunes. So, that explains why your iPhone is disabled.
But, what if you have not tried to access your device? In that case, someone else had probably tried to do so and failed. Regardless, you must take the necessary steps to fix the disabled iPhone issue.
Steps to Unlock Your iPhone Using iTunes
You need the iTunes app on your computer to unlock your iPhone using it. Once you have that, you can back up and unlock your iPhone in a few simple steps. Here is how to proceed with unlocking your iPhone with the help of iTunes:
Install iTunes (On PC)
Mac devices come with iTunes pre-installed on them. So, you need not install the app on them separately. Are you using a PC? Then, you would probably need to download iTunes on it first, and this app is free. You must download it from Apple’s official website. Navigate to the iTunes download section and proceed with downloading and installing the app. Then, proceed with the next step once you are done.
Put Your iPhone in Recovery Mode
You must enable the Recovery Mode on your iPhone before attempting to unlock it. And, the procedure for doing that depends on the model you are using. You must press and release the Volume Up and then the Volume Down buttons on the latest iPhones. Hold the Power button until you see the Recovery Mode on your screen.
Are you using an iPhone 7 or 7 Plus? Press and hold down the Power and Volume buttons. Release them once you reach the Recover Mode. On iPhone 6s and earlier, you must press and hold down the Power and Home buttons.
Connect Your iPhone to the iTunes Device
You need to connect your iPhone to a computer that has iTunes using a USB connection. You can simply use your iPhone charger’s cable for this purpose. Make sure to set up the connection properly. Connect the cable firmly at both ends and proceed with finding your iPhone in iTunes.
Launch iTunes on Your Computer and Find Your iPhone
Open the iTunes app once you have connected the iPhone to the computer. You will find your iPhone in the upper-left corner of the latest iTunes version. And, on iTunes 11, you would find it on the right side.
Are you using iTunes 10? You must look for the iPhone on the left sidebar. Select your disabled iPhone and proceed with the next step.
Backup and Restore Your iPhone
Once you have selected your iPhone, you will find the option to back up its data. Do you have any important files on your phone that you have not backed up? You must back them up right now before restoring the device, that way you would lose your iPhone’s settings but not its files.
Wait for the backup process to complete before you restore the device. Click on the Restore option when you are ready to bring back your iPhone’s factory settings. This will remove the security and let you access the device without any passcode. You must then set up your iPhone once again as per your preferences.
What if You are Unable to Use iTunes to Unlock Your iPhone?
Not all users might have the option to use iTunes to unlock their iPhones. In such cases, you must try using the Find My iPhone feature to restore your iPhone. But, this method works only if you have enabled this feature on your device.
Also, your device must be connected to the internet so that you can locate it. You must fulfill these conditions and proceed with the following steps to restore your iPhone:
Log in to Your iCloud Account
Open the iCloud website on your web browser, then enter your Apple credentials to access your account. You will find a wide range of options after logging in to iCloud, that includes the Find My iPhone, which you need to use in this case.
Find Your iPhone and Erase it
Does your iPhone have Find My feature enabled? Then, you must click on Find my iPhone in your iCloud account and select the device. This will bring up your device’s current location if it has an internet connection.
In this case, you must check the options for it, and then opt for erasing it. This will remove all its customised settings and restore the default ones. You can then set up your iPhone again and set a new passcode on it.
Reach Out to the Service Center
iTunes can help you gain back access to your iPhone within a very short time as we have seen. Apart from that, erasing it from the iCloud is also quite a simple solution. But, you might fail to proceed with either of them due to various reasons. This is when you must reach out to the nearest service center.