The very first thing you need to do after unboxing your new iPhone is set it up. Regardless of the model, iPhones are quite easy to set up. You can complete the setup procedure within a very short time. And, you usually would not need any assistance with completing it. But, in case you do, then the information given below should provide all the help you need.
You would probably want to import the data from your older phone to your new iPhone. The setup procedure includes that step, too, as we shall see.
Steps to Set Up Your New iPhone
You can proceed with the setup without an Apple ID, but you must consider creating one. And, this applies especially to people who are switching from a non-Apple device to an iPhone.
So, visit the official website for Apple ID creation and opt for creating a new account. You can complete this procedure by providing some necessary details.
After creating an Apple ID, you must proceed with the following setup steps for your iPhone:
Select a Language
The first step in the setup procedure is to select a suitable device language. You would get a wide range of language options right after turning the device on. Select the one you prefer for your iPhone and proceed to the next step. If required, you can change the language anytime after setting it up.
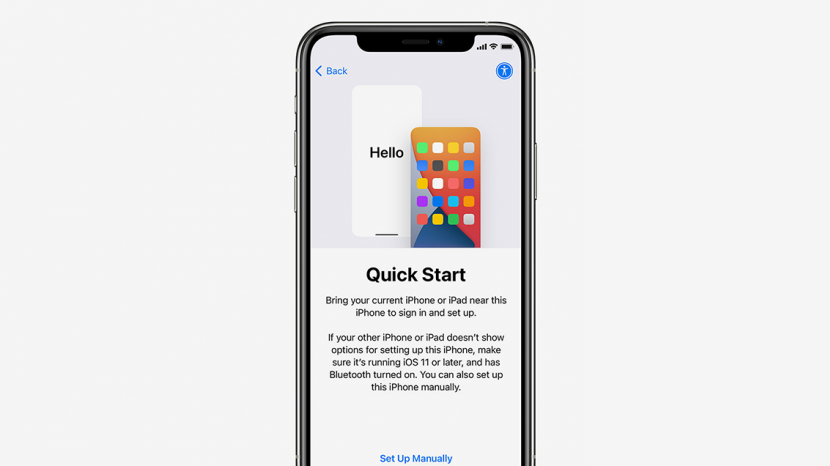
After selecting the language, you would get the option to set up your device manually. In this case, you must select it to set up your iPhone as a new device.
Activate Your iPhone
After opting for a manual setup, you must activate your device. Connect the iPhone to the nearest WiFi to accomplish that. Your device will proceed to the next step automatically after it is activated.
Are you facing any issues with activating your device? Ensure the WiFi network has a proper internet connection. If that does not work, you must find a better network to proceed to the next step.
Set Up Face or Touch ID Security
The latest iPhone models feature Face ID and Touch ID to secure the device. As its name suggests, the Touch ID identifies the user’s fingerprint to unlock the device. Likewise, the Face ID feature recognises users’ faces to grant them access. You can opt for either of these security features depending on your preferences.
Do you want to set these features up later on? You can opt for that as well. You can also read more about these two features during the setup procedure. If you select the Face ID, you must create a passcode for validation. Your device will ask for it if the Face ID cannot give you access.
Import Apps and Data or Keep Your Device Like New
After setting up the security, you can opt for importing apps and data from other devices. And, that includes from your Mac, PC, Android or another iPhone. Moreover, you can also import data from your iCloud if you have an account. If you do not want to import anything, click on ‘Don’t Transfer Apps and Data’. Then, you must proceed to use your Apple ID to sign in.
Sign in to Your Device Using Apple ID
Do you have an Apple ID? You must use this account to sign in to your device. Otherwise, you can also opt for signing in without an Apple ID. In any case, this step is a very simple one. If you are using your Apple ID, you must provide the credentials to proceed further.
Set Up Automatic Updates, App Information Sharing, and Siri
The latest iPhones models allow you to opt for automatic updates. But, that might not suit the preferences of all users. So, you must determine whether you need this feature on your iPhone. You can enable it later from the Settings if you ignore it during the setup.
Do you want to share app information with the developers to get an improved service? If yes, then you must enable this feature during the setup procedure. Otherwise, move onto the next step for setting up Siri. Like the aforementioned options, you can also set up Siri later on from the Settings.
Set Up the iCloud Keychain and Screen Time
iPhones have a Password Manager called iCloud Keychain that is quite useful in many situations. And, you can enable and set this feature up during the iPhone setup process. The same applies for Screen Time, which is a parental control feature. You simply need to follow the instructions that show up if you opt for setting them up. Needless to say, you can enable and customise them later on through your device settings.
How to Move Your Android Data to the New iPhone?
You might have switched from an Android device to an iOS one. In that case, you can transfer the former’s data to the latter during iPhone setup. You must select the ‘Move Data from Android’ if you want to do that. But, before that, you need to download the Move to iOS app on your Android device.
So, open the Play Store on the older phone and install the aforementioned app. Then, launch it and opt for transferring Android data to your new iPhone. You must click on ‘Continue’ on both the devices to initiate the transfer. Check the code that you see on your iPhone’s screen and enter it in the Move to iOS app. Click on Connect with the devices placed near each other.
Select the data on your old phone that you want to transfer to your iPhone. Click on Done on your Android after the transfer is complete.
Protect Your iPhone’s Screen
After setting up your iPhone, you must ensure the protection of its screen. So, you must put a screen protector on it as soon as possible. Apart from that, you can also consider covering situations of accidental damage with AppleCare. And, that might help you control the repair costs in case of screen damage.